DIY Climbing Rope Dog Leash
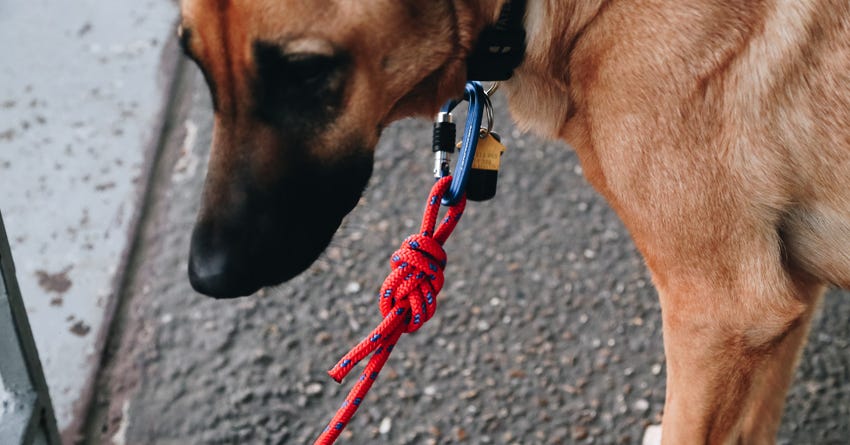
Dog leashes made out of climbing rope and carabiners are having a moment.
If you’re at all outdoorsy, chances are you’ve seen them advertised—along with their hefty price tags. However, it’s a cinch to make your own in under half an hour, for less than $20. All you need is a couple of items from your local outdoor store.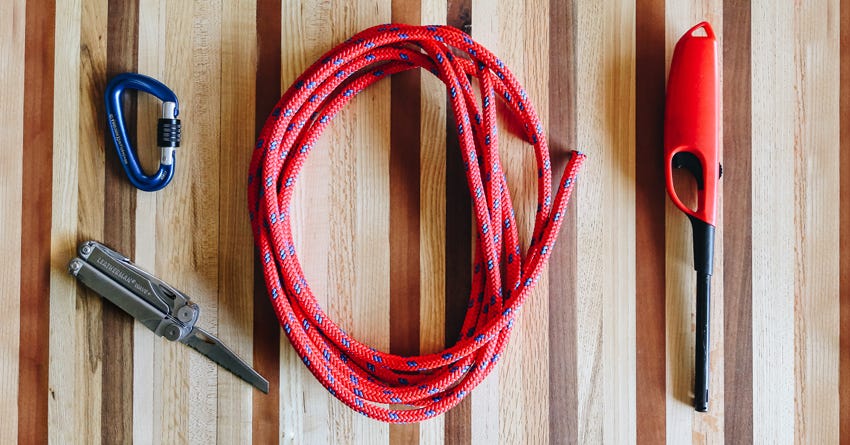
What you’ll need
- Rope measuring your desired leash length + 2 feet ($9). You can use sturdy utility cord, which can be purchased by the foot at an outdoor store, or old climbing rope. I used 12 ft of 9mm utility cord to make a leash that is just over 10 ft long and strong enough to hold my energetic 70 lb shepherd mix puppy. If you want to use old climbing rope but don’t have any, you may be able to get your hands on some for very cheap through your outdoor store or a used gear group online.
- A locking/screwgate carabiner ($10). This specialized carabiner has a gate on it that screws shut, making it impossible for man or beast to open the carabiner until the gate is unscrewed. For a small dog, a regular carabiner may work, but any non-locking carabiner can be slipped open at just the right angle—meaning that if everything aligns, your pup may be able to pull off of her leash to run after that squirrel. Lock that baby up. Just remember that your dog will be carrying this around its neck—make sure not to use a carabiner so large that it is too heavy or awkward for her.
- A knife, multi-tool, or pair of strong scissors.
- A lighter.

Step 1: knot the loop for your carabiner.
This is the end that will attach to your dog’s collar, so the knot should be very strong. I used a figure 8 knot, which is a very secure knot used in rock climbing. If you aren’t a climber or knot-smith, a standard overhand loop knot will do just fine.
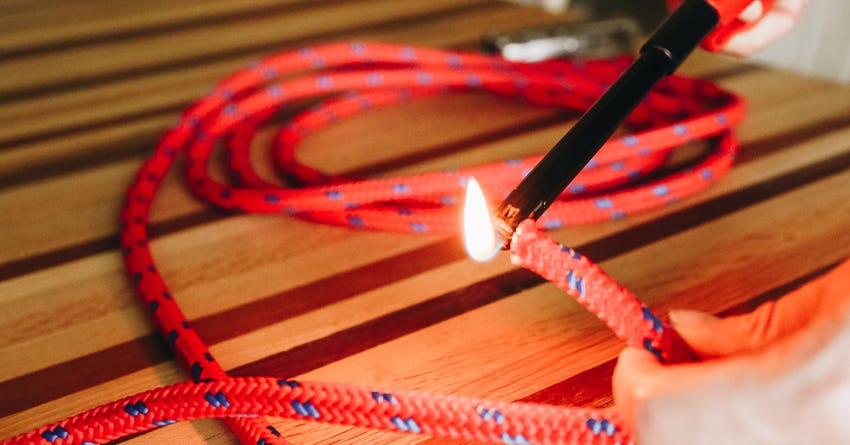
Step 2: trim and burn the tail of your rope.
If needed, once your knot is firmly in place, trim the end of your rope. (You can also simply retie your knot so that you have less of a tail, but if you don’t enjoy knot tying, trimming is easier.) Any trimmed edges of rope will need to be burned so that they don’t fray. Use a lighter to singe the raw end of your cut rope until it is solidly glazed over. It may turn black and smoke, but don’t worry. A burnt end won’t hurt anything. You shouldn’t be able to see any strands of rope sticking out.
Step 3: lock your carabiner in place.
Simply attach your carabiner to the loop, and the dog-end of your leash is ready to go!
Step 4: make your handle loop.
Create a loop big enough to fit your hand into, and secure it with either a figure 8 or an overhand knot. This will form your handle. I chose to use an overhand knot for this end. If necessary, trim and singe end as before. That’s it! You’ve made a fully-functional, outdoorsy, trendy, very sturdy dog leash for under $20.
 You can spice this project up easily by braiding thinner cord instead of using one thick cord. You could even make your dog a variety of leashes using different colors and lengths of cord, simply swapping out the carabiner for each leash. The possibilities are endless!
 Time to go on a walk!
photos by Emalie Cockrell
Time to go on a walk!
photos by Emalie Cockrell