
Elevated dog bowls can be a great idea for some dogs.
Other dogs might not need them. Most dogs simply don't care. If you're wanting to get an elevated dog bowl for your pooch but can't find one you like, make one! I used my Giant Schnauzer, Hildie, as the model for this project, but its forever home is with my woodworking associate's Collie/Labrador mix, Tumble. (Hildie is just a couple inches taller, but about 40 pounds heavier. She was very supportive! Lots of treats were awarded.) Before we dive into it, let's list out a few reasons why you might want an elevated dog bowl.Why would I want an elevated dog bowl?
Medical Conditions: Dogs with certain medical conditions, like arthritis, back problems, or a stiff or sore neck, can benefit from a bowl that is raised off the floor some. Dogs that suffer from megaesophagus, which makes it difficult for them to swallow, can benefit from a raised bowl. Voracious Eaters: Dogs who scarf down their food might slow down a bit when eating from an elevated dog bowl. Combine it with a slow feeder and it should really hinder your dog's ability to inhale his food. Ease for Owners: Dog owners who find it difficult to put the bowls on the floor may find a benefit to raised bowls. Bowl Chasers. These set-ups also tend to stay put, so your dog won't end up chasing his food bowls around to get those last few tasty tidbits. Paddling/Burying: Some dogs that were bred for swimming will paddle or try to swim their feet in their water bowls. Other dogs try to "bury" their food (even though there's nothing to bury it with). This not only makes the floor a mess, but it also makes it hard to keep bowls filled with water and even food. An elevated bowl might stop this tendency. Other Paws Off: If you have multiple dogs (and cats) who like to steal each other's food, sometimes separating heights of the bowls might reinforce teaching them to stop stealing food. Different dog sizes call for different sized bowls. If you have a short dog, then your "elevated dog bowl" will be barely off the ground. If you have a giant, it will be over a foot off the ground.
Simple or Complex?
Before you head into this project, decide now: how complicated do you want to get? I was originally wanting to go simple: just a board with circles cut into it for the bowls to hang from, and some sort of legs. Quick, easy, take me an hour or two—I'd spend more time with the pretty details than the structure. But what if you want to add more to it? Shelves, drawers, lids? We decided to go crazy—make a box with a drawer. This meant a whole heck of a lot more measurements and things to go wrong. And almost everything that could go wrong, did. For the sake of this tutorial, I'll make sure to hit on the highlights that you should watch out for, and things to keep in mind no matter what kind of dog bowl you want. Wood, bins, slides, bowls. Not pictured: the drawer base and all the screws. | photo by Thomas Mulcahy
Materials Needed:
I made mine out of wood. You clearly can make it out of all sorts of materials, using whatever you can find. For a simple wood elevated dog bowl, you'll need: wood, screws, bowls (with a substantial lip), something to make a hole (jigsaw), drills, and a whole lot of measurements. If you want to add a drawer or shelves, you'll clearly need to get a bit more creative. Honestly, my end result was quite large—but it was as small as I could make it with the slides I already had, and the bins and bowls we wanted to use. The specifics of the wood and screws depend upon the measurements you take. The stuff I bought:- one 16" x 72" stain-ready pine board
- one 20" x 72" stain-ready pine board
- two 9" bowls (I found slow feeders, because the Collie/Labrador inhales food)
- two 8.5" x 15.5" x 12" bins
- drawer and slides salvaged from scrapped cabinet
- ~twenty 1" screws
- bigger screws as desired (I used a combination of 1" and 2", as I like my stuff sturdier)
- stain
- handle
Measurements to Note:
- The height of your dog from ground to chest, particularly when sniffing or eating (my Giant Schnauzer is about 15 inches)
- Diameter of dog bowls (right below the lip)
- Height of dog bowls
- Thickness of the boards (depending on how you do it, your screws will need to be tiny—so be sure to measure before buying screws!)
- Any other things you want added to this contraption (in my case—dimensions of the bins and slides)
 The bins fit perfectly in the drawer, so we made the whole structure based on these dimensions. | photo by Thomas Mulcahy
Building Your Elevated Dog Bowl
Once I got my measurements ready, it was time for some shopping. I had a lot of screws and tools, so all I needed was some wood, bins, and bowls. I was in a time crunch, so I didn't have the luxury of buying cheaper stuff and making my own boards—so in total, it cost me about $120. With screws and tools included, it would definitely be more. But I was committed. (This is why pre-made, real wood furniture costs so much...) Find a sizing reference point. I used the bin size and the already made shelf with slides as our reference point. The bins fit perfectly on the drawer, which was semi-planned. We have the outer dimensions of the box! Based on the height of the bins, bowls, and dog, we wanted the bowl's top to sit at around 14 inches. We trimmed 2" off the long edge of the 16" board, then cut it down for the sides and back. The sides attached to slides, with the strip below. | photo by Thomas Mulcahy
 Sides, back, and front affixed. | photo by Thomas Mulcahy
 Fancy geometry to find where to put the holes. | photo by Thomas Mulcahy
 The bowls fit! The holes weren't perfect, but got the job done. | photo by Thomas Mulcahy
 45º angle braces, because otherwise opening the drawer wouldn't work. | photo by Thomas Mulcahy
 Sanding. And the bins fit perfectly! | photo by Thomas Mulcahy
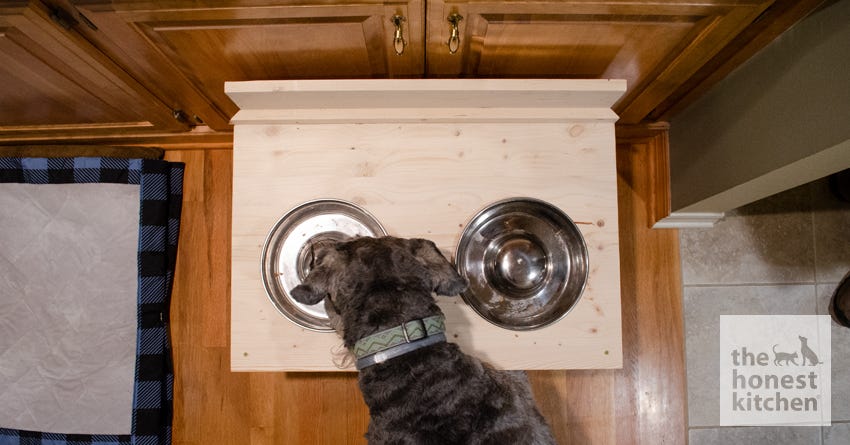
 Usable for now! Hildie waiting patiently for her treats. | photo by Thomas Mulcahy
 Staining made the funky cover-up designs less jarring. | photo by Austin Conley
 The bins doing work! | photo by Austin Conley
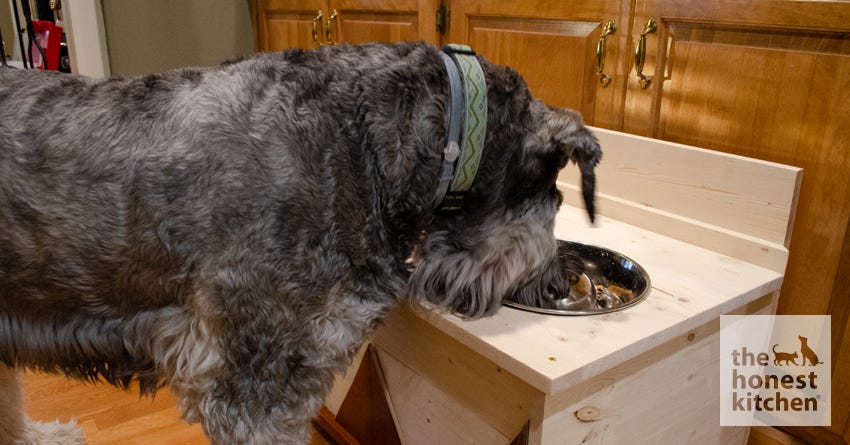 Perfect height for Hildie. | photo by Thomas Mulcahy
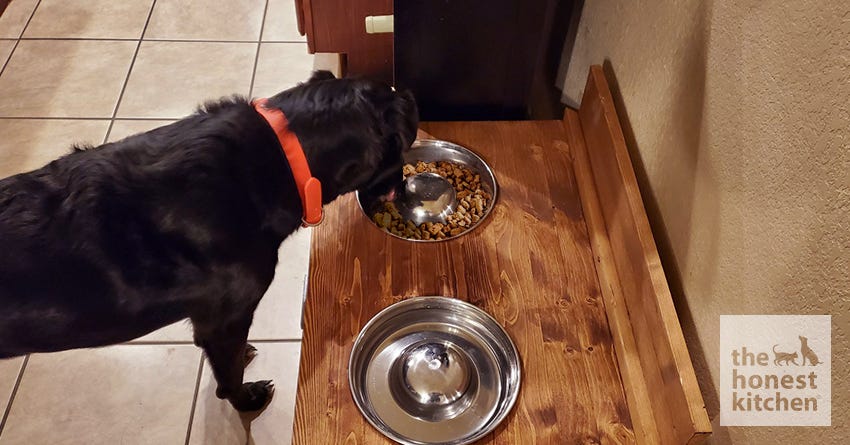 Tumble loves it, too! Bonus points for the elevated and slow feeder combo slowing down his food scarfing. | photo by Austin Conley
Thomas can't remember a time when his household didn't have a four-legged member of the family. When our Giant Schnauzer isn't digging around for rodents to play with, she's patiently waiting for food to drop to the floor or barking at the mailman. Thomas now swears by Schnauzers as being the best breed ever—they don't shed and they're the smartest and most entertaining dogs he's ever met. Plus the Giants make great wrestling partners.
