Slip leashes are perfect to have around for when you need a leash quick.
A friend recently got a new dog. He's about 8 months old, medium sized, and of unknown ancestry. He's an all American with probably quite a few breeds mixed in. His new name is Buster and when I met him I liked him. He's a sweet dog.
His owner looked puzzled, though, when I handed her a couple of my home made slip leashes. "I've already gotten him a collar and a leash," she said.
I replied, "That's great. Those are for every day use. These are for those other days when things don't go according to plan."
Why do you need Emergency Slip Leashes?
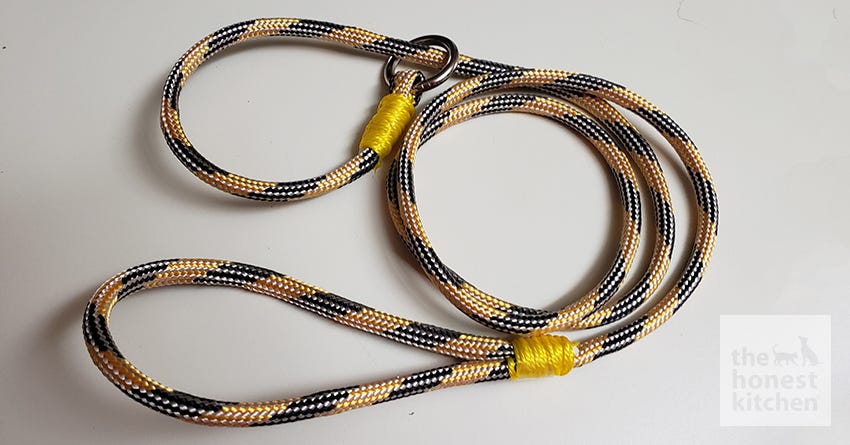
A slip leash is a leash without a clip at the end. Instead, the end is a loop that can be slipped over the dog's head. These do it yourself slip leashes aren't for daily use as they aren't as strong and sturdy as commercial leashes. They are, however, easy to make and work well in emergencies or other unplanned situations.
If you have a few of these leashes made up and stashed in various places, then you will always have one at hand. Put one in the first aid kit in your car or RV, put one near the front door, near the gate, in your car, in with your dog walking backpack, and with your therapy dog supplies.

To make two leashes you will need two lengths of rope, two 'O' rings, string, glue, matches, and a pair of scissors.
Materials required to make a slip leash:
We'll be making 2 leashes with these materials, so you can start stashing extra leashes around. To make two of these leashes you will need two 5 foot lengths of 1/4" or 3/8" width poly or poly blend climbing rope. Big box hardware stores always have this in the hardware section. It's found in a variety of colors and color patterns, so choose what pleases you.
You will also need a roll of nylon or poly blend twisted line or twine. This can usually be found near the rope in stores or you may also have some at home.
Other supplies include two 'O' rings, one inch in diameter, or if you have some at home that are slightly larger that is fine. You will need a pair of scissors, all-purpose glue, and some matches.
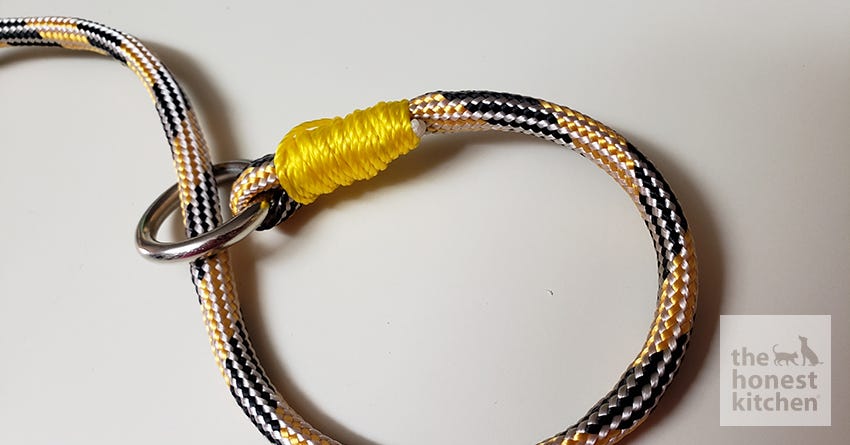
Completed collar end of the leash.
Making a slip leash takes just five minutes!
Once you have all your supplies you can make one of these leashes in five minutes. They are that quick and easy.
- Once you cut your two five-foot sections of rope, use your matches to melt each end of the rope so that the rope doesn't unravel. Hold the end in the flame for a few seconds then remove it from the flame, blow it out, and let it cool before touching it.
- Feed about an inch of the rope through one of the 'O' rings and bend it back to itself. Put a few drops of glue between the bent part of the rope and the longer section so that when the glue dries, the pieces are stuck together.
- Tie a large knot at the end of your string and place it where the two pieces of rope are glued together. Then begin wrapping the string around the two pieces of glued rope and that big knot. Pull the string as tight as you can and wrap it back and forth in several layers over this section. (See the photo.) When it's well wrapped and secure, tie a good knot around the wrapped section, trim the string, and melt the end of the string.
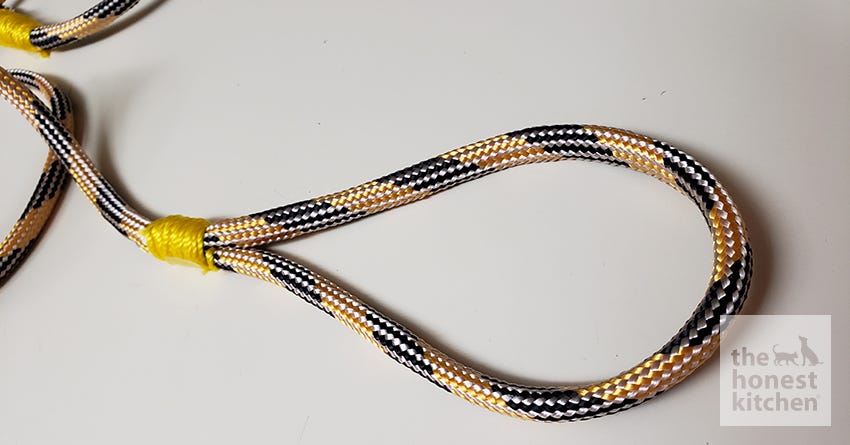
Completed handle end of the leash.
- Now take the other end of the rope, the loose end, and feed it through the 'O' ring. This forms the collar part of the slip leash.
- Once the loose end has been fed through the 'O' ring end of the rope, you will want to make a handle. Bend the end back creating a handle large enough to be comfortable for your hand. Glue about an inch of the loose end to the correct spot of the rope to form the handle and then warp the string around it as you did at the 'O' ring. Tie a knot, trim the string, and melt the end of the the string as you did at the 'O' ring.
- Set everything aside to allow the glue to dry and set. Once the glue is hardened, your leash is finished. Now repeat the process to make the second leash (and however many more leashes you might need to make).